
Comparing On-device OCR Frameworks Apple Vision and Google MLKit
30. Juni 2021
9 Minuten zum lesen
9 Min.
Office Stuttgart
Bitfactory Solutions GmbH
Gutenbergstr. 77a
70197 Stuttgart
Germany

30. Juni 2021
9 Minuten zum lesen
9 Min.

21. Juni 2021
8 Minuten zum lesen
8 Min.
Werden Sie Teil unserer Mailing Liste und bleiben Sie informiert über Tech, Apps, Backend
"We shape the digital future of the industry sector"
In order to achieve our vision, we at Bitfactory try our best to produce clean, well formatted and qualitative code that fits the programming language coding standards. This way we have well readable and consistent code so every developer can understand it easily and thus prevent bugs from even happening. In order to help us write such code we use static code analysis tools that inspect the code for code smells and formatting problems.
For our Android projects we use the Detekt static code analysis tool. It operates on the abstract syntax tree supplied by the Kotlin provider. Therefore it can analyse the project code and provide warnings about code smells, complexity and failures of following the Kotlin coding conventions. In combination with the KTLint plugin for Detekt we can even automate the process of formatting our code according to the Kotlin coding conventions which saves a lot of time and enforces the same formatting for every developer so we have more consistent code.
If you want to read more about Detekt or KTLint check here for the official Detekt or KTLint documentation.
Like most of you we use Gradle as our build automation tool for android projects. In order to include Detekt in your Android project simply add the following lines into your projects build.gradle file (this is in Groovy DSL – if you want to use Kotlin DSL just convert it or see the official documentation of Detekt):
buildscript {
  ext.detekt_version = "1.16.0" // Define a variable so in case of an update we only need to update this variable

  repositories {
    jcenter() // add if not existent
 }
}

plugins {
    id "io.gitlab.arturbosch.detekt" version "$detekt_version"
}
As you can see we define ourselves a detekt_version variable for our project so in case of an update we just need to modify this variable and it will use the new version everywhere else in our configuration. Also we need to add the jcenter repository if it is not already existing in theo repositories. Lastly we just define that we want to use Detekt as a plugin for our project. If you are still using the legacy buildscript variation, also check the official documentation of Detekt to see how to include a plugin the legacy way.
Theoretically Detekt is now included in our project but there is still some configuration that we need to do so Detekt knows what and how it should analyse. It is quite simple; we just need to add a few more lines to the projects build.gradle:
detekt {
    // Detekt version to use, make sure its smaller or the same as the buildscript version
    toolVersion = "$detekt_version"

    // Where Detekt should look for source files to analyse
    // example: input = files("src/main/java", "src/main/kotlin")
    input = files("$projectDir")

    // Where Detekt should look for configurations we want to use
    // example: config = files("path/to/config.yml")
    config = files("$projectDir/detekt-config.yml")

    // Applies the config files on top of detekt's default config file. `false` by default.
    // Helps to shrink down the configuration file if you only want some changes or use the default only
    buildUponDefaultConfig = true

    // Specify the base path for file paths in the formatted reports.
    // If not set, all file paths reported will be absolute file path.
    basePath = projectDir

    // What kind of report output is desired. Will be located under /build/reports/detekt/
   // The location can also be changed if needed
    reports {
        reports {
            html.enabled = true
            xml.enabled = true
            txt.enabled = false
            sarif.enabled = false
        }
    }

    // Enable ktlint auto formatting (only works with plugin installed)
    // autoCorrect = true
}
This way we configure Detekt to use the version we defined earlier, look for code to analyse in our project directory (the one returned from getDirectory() from gradle), use the config file with our rulesets detekt-config.yml (we will define that later), use relative display of paths and where which reports should be enabled.
Regarding the buildUponDefaultConfig = true configuration: This tells Detekt to use their default rulesets and just overwrite them with the rulesets we define in our detekt-config.yml. If you don’t want this behaviour and only want to use your own custom made rulesets, change buildUponDefaultConfig = false. No matter if you choose to use the buildUponDefaultConfig option or not, you need to make sure to create that detekt-config.yml file in the project directory and define your rulesets (if any are wanted, otherwise just let it empty).
Now you are all set! You should sync your gradle changes and then be able to run the Gradle Detekt task, either by typing ./gradlew Detekt into your CLI or (if you are using AndroidStudio) searching and double clicking the Detekt Gradle Task on the Gradle Sidebar in the top right.
If your code is well formatted and detekt doesn’t find any problems it should run to completion and you should see BUILD SUCCESSFUL in 1s, otherwise it should fail and output the rules that your code violates. For example we defined our ruleset in a way that TODO comments are only allowed if they include an associated ticket number. Below is an example output of Detekt that will inform us about a violation of said Ruleset, because we have not included a JIRA-Ticket reference in the TODO comment.
Task :detekt FAILED
style - 10min debt
        ForbiddenComment - [onCreate] at /DetektTestApplication/app/src/main/java/com/example/detekttestapplication/MainActivity.kt:18:3
So we know that there is a forbidden comment in our MainActivity. Detekt also tries to provide us with an estimated time that we need to fix that issue although most likely errors can be fixed faster then approximated.
Detekt itself provides a wrapper over ktlint as a formatting rule set which can be easily added to the gradle configuration:
dependencies {
    detektPlugins "io.gitlab.arturbosch.detekt:detekt-formatting:$detekt_version"
}
With those 3 lines we now included the KTLint Wrapper into Detekt. But if you run ./gradlew Detekt now it still doesn’t automatically format. This is because we need to allow Detekt to correct the errors it can automatically fix. We do this by uncommenting (or adding, if not existing) the autoCorrect option in our Detekt configuration in our projects build.gradle:
detekt {
    // We configured the rest of that in the previous step already
    [...]

    // Enable ktlint auto formatting (only works with plugin installed)
    autoCorrect = true
}
Now if you run ./gradlew Detekt again, it should automatically format your code (if it can) respectively to the Kotlin Coding Conventions. For example it will fix whitespace by adding or removing any additional whitespace.
HINT: There is currently a bug regarding auto correction of formatting errors when using buildUponDefaultConfig = true. To fix that use the default Detekt config by setting buildUponDefaultConfig = false and copying the default detekt config into the detekt-config.yml then apply your or your companies desired rules by replacing the rulesets in this file. I’ve created a Bug ticket that you can track here. If this is fixed, use buildUponDefaultConfig = true and only include rules that should be overwritten in the project config file
OK – we now have a powerful static analysis tool that will try to automatically fix issues for us that it detects and if it can’t, it will inform us to fix these before building the project. Pretty cool, huh? But let’s be honest: It is going to be pretty annoying to remember to run ./gradlew detekt every time before committing so we make sure we only commit and push clean code. You or some devs in your team will eventually forget or just ignore it. But fortunately there is a fix for that: We can automate the execution of the Gradle Detekt tasks by adding a Git hook!
A Git hook is a script that will be executed before a specified Git action. For example if we want to perform an action before every commit (which fits our case) we need to put the executable script in the projects .git/hooks/ directory (it should already contain some *.sample files) and name it pre-commit.
The script that we will use in order to perform ./gradlew detekt is as follows:
#!/usr/bin/env bash
echo "Running detekt check..."

OUTPUT="/tmp/detekt-$(date +%s)"
./gradlew detekt > $OUTPUT
EXIT_CODE=$?
if [ $EXIT_CODE -ne 0 ]; then
  cat $OUTPUT
  rm $OUTPUT
  echo "***********************************************"
  echo "                 DETEKT ISSUES                 "
  echo " Please fix the above issues before committing "
  echo "***********************************************"
  exit $EXIT_CODE
fi
rm $OUTPUT
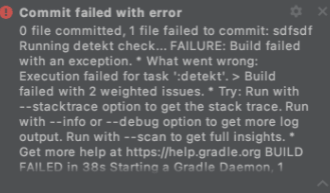
This script will run ./gradlew detekt and checks the output of that task. If there are no (or only auto-fixable errors) the commit will be made. Otherwise the commit gets aborted and you will see the problems in the terminal (if you git push via terminal) or Android Studio will display you a little message that looks like this:
Sadly, the error message that we get from Git or Android Studio when committing via the GUI included in Android Studio is really bad formatted and we can’t read that much from it. You could manually run ./gradlew detekt from the CLI when you get this error to see why Detekt is not letting you commit your changes. We came up with a different solution: Since a lot of us at Bitfactory use the commit shortcut that comes with Android Studio (which is using the GUI Commit) we modified the script to open the Detekt HTML-Output file on the browser, if there was one or more issues detected. If you want the same behaviour, simply add the open …line to the script:
[...]
    echo "***********************************************"
    open "build/reports/detekt/detekt.html"
    exit $EXIT_CODE
[...]
If you are single developer and work on the project on one machine locally, you are good to go with the above mentioned method but if you set up a project for a company or want to use detekt on multiple devices you will run into an issue: As you might know the .git directory is not tracked and therefore not shared by Git itself. This is a problem because this means that every developer had to put the script into his .git directory manually. But as mentioned earlier, we don’t want to rely on that because some will forget or just ignore it – it is basically a single point of failure. If we want to „share“ the script via our VCS we have to take use of a little trick with Gradle Tasks:
What we will do instead of putting the script from above and instead of putting it into .git/hooks/pre-commit we will put the script under our project directory as detekt-pre-commit-script. Please note: the naming is important otherwise the following gradle task cannot find it. Now we define ourselves a gradle task that will copy the script and put it into the users .git/hooks directory. Theoretically you can put the following lines into your build.gradle but the recommended way is to create a new file called pre-hooks.gradle in the project directory and define the task there for a better overview and a cleaner build.gradle. It should contain the following:
static def isLinuxOrMacOs() {
    def osName = System.getProperty('os.name').toLowerCase(Locale.ROOT)
    return osName.contains('linux') || osName.contains('mac os') || osName.contains('macos')
}

task copyGitHooks(type: Copy) {
    description "Copies the git hooks from ${rootDir} into the .git hooks folder."
    from("$rootDir/detekt-pre-commit-script"){
        rename('.*', 'pre-commit')
       fileMode 0777
    }
    into "${rootDir}/.git/hooks"
    onlyIf { isLinuxOrMacOs() }
}

afterEvaluate {
    // We install the hook at the first occasion
    tasks['clean'].dependsOn copyGitHooks
    tasks['assemble'].dependsOn copyGitHooks
}
This will first define a static function which will determine if the current system is a UN*X based system, since the tasks will only work on these and therefore should only be executed if it is a UN*X based system. Then we have the definition of our task which will take the detekt-pre-commit-script in our root project directory, copy it to the .git/hooks folder, rename it to pre-commit and modify the file to be an executable script. This task will only run – as already said – on UN*X based systems. Lastly we „attach“ our copyGitHooks task to the clean and assemble tasks that come built-in with Gradle and will get called when either you clean the project or build it.
We now just need to tell in our build.gradle that we want to include this file into our Gradle project by adding these few lines to it:
apply from: "$rootProject.projectDir/git-hooks.gradle"
So once someone pulls the project from your VCS and either builds or cleans the project (whatever occurs first) Gradle will automatically run our copyGitHooks task which will then copy our script into the users local git/hooks folder so when he commits something Detekt will automatically run.

30. Juni 2021
9 Minuten zum lesen
9 Min.
21. Juni 2021
8 Minuten zum lesen
8 Min.